Products
Solutions
Resources
9977 N 90th Street, Suite 250 Scottsdale, AZ 85258 | 1-800-637-7496
© 2024 InEight, Inc. All Rights Reserved | Privacy Statement | Terms of Service | Cookie Policy | Do not sell/share my information

During a project, you may encounter changes that result in a budget move which adds no additional budget to the total project budget. For example, you may decide to change the means and methods for completing an operation which results in moving budget from one operation to another. Performing a budget move allows you to accurately track budget changes to maintain a clear history and ensure costs moving forward are accurate.
In the example structural steel scenario, the Original Budget for Erect Steel – Light that was initially carried from Estimate to Control has been found to be in excess, and a portion of this budget’s dollar value needs to be moved to your newly created cost item, Module [your User ID#] - Erect Steel Heavy.
It is important to remember that Current Budget cost and man-hours are only maintained at the terminal level, and you cannot move cost to/from a parent cost item. You can move dollar values between multiple cost items at the same time.
You can match CE from CB only in a non-associated budget move and in a cost items first contract adjustment.
InEight Control contains a Budget Move Wizard that walks you through the following steps for performing a budget move:
Select From & To Items
Define Relationships
Assign Amounts
Adjust Cost Categories
Summary (submit to pending)
The following Step by Step walks you through how to perform a net zero-dollar Budget Move in the tool.
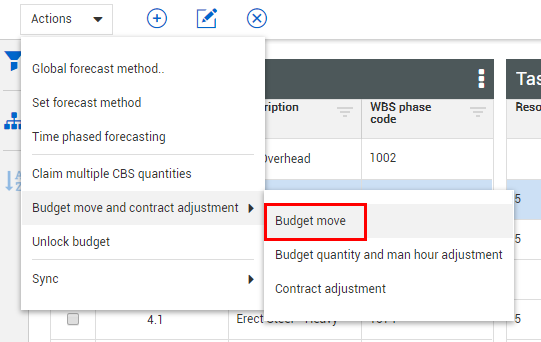
Hover over the Actions drop-down menu, hover over Budget move & contract adjustment, then select Budget move.
The Budget Move – Details window appears
The Details window can be used to enter any relevant information, but is optional
The default budget move workflow is Non-Associated. Select the Associated radio button.
Type 001XX (where XX are your initials) in the Issue # free text box.
The Issue # is a text field used solely for informational purposes
Type Spread budget from Light Steel to Module Heavy Steel in the Description text box.
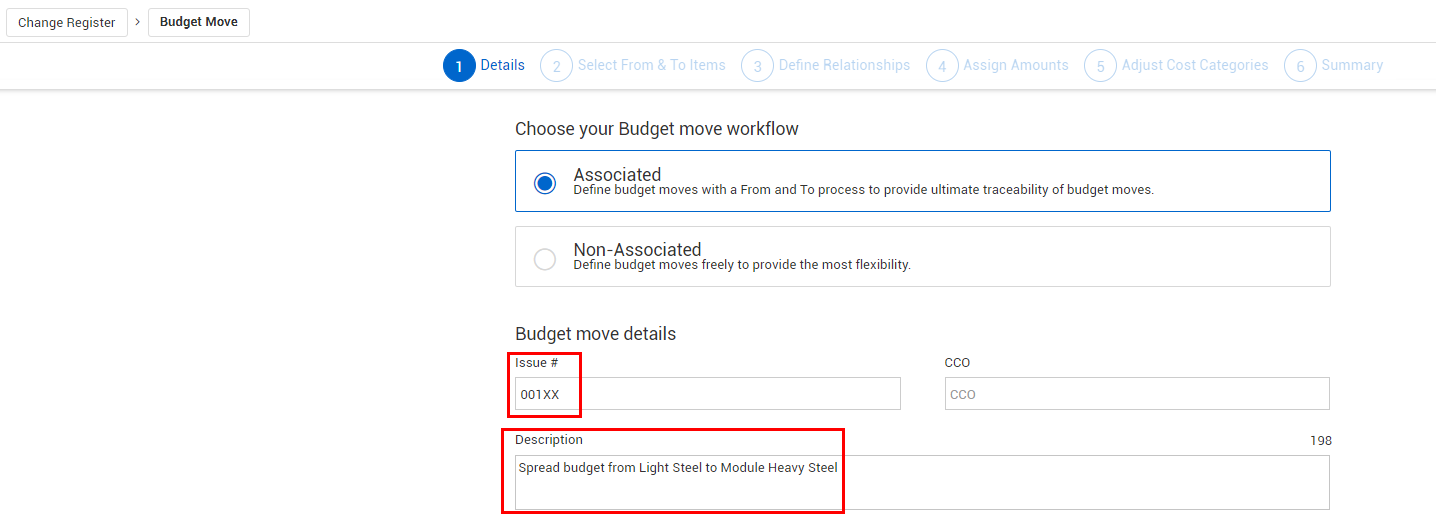
Click Next.
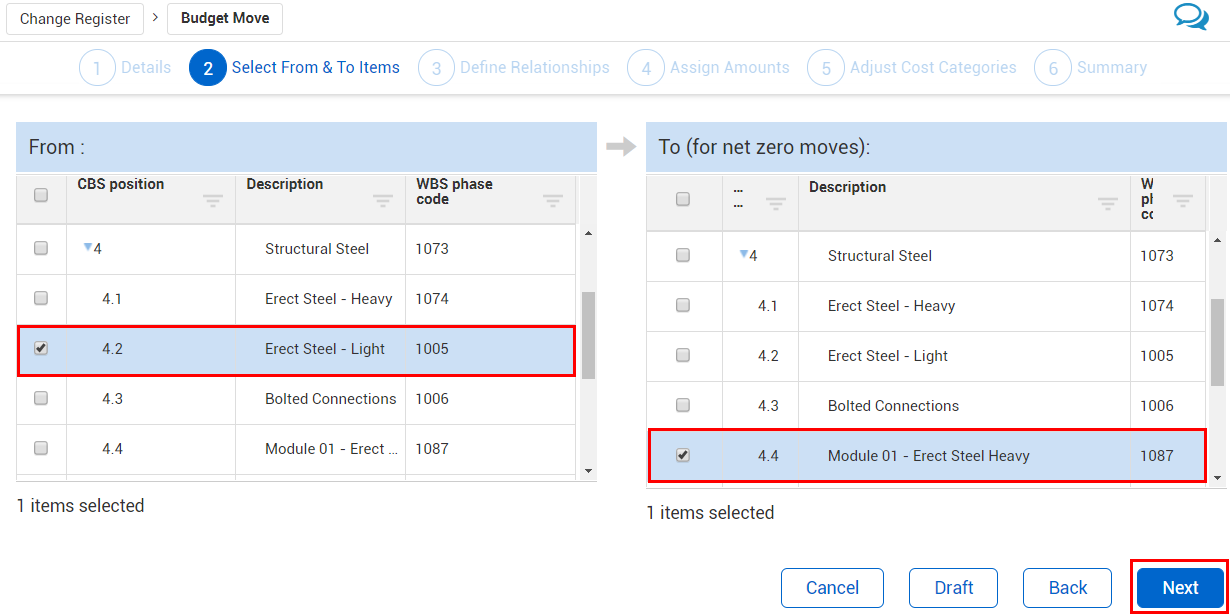
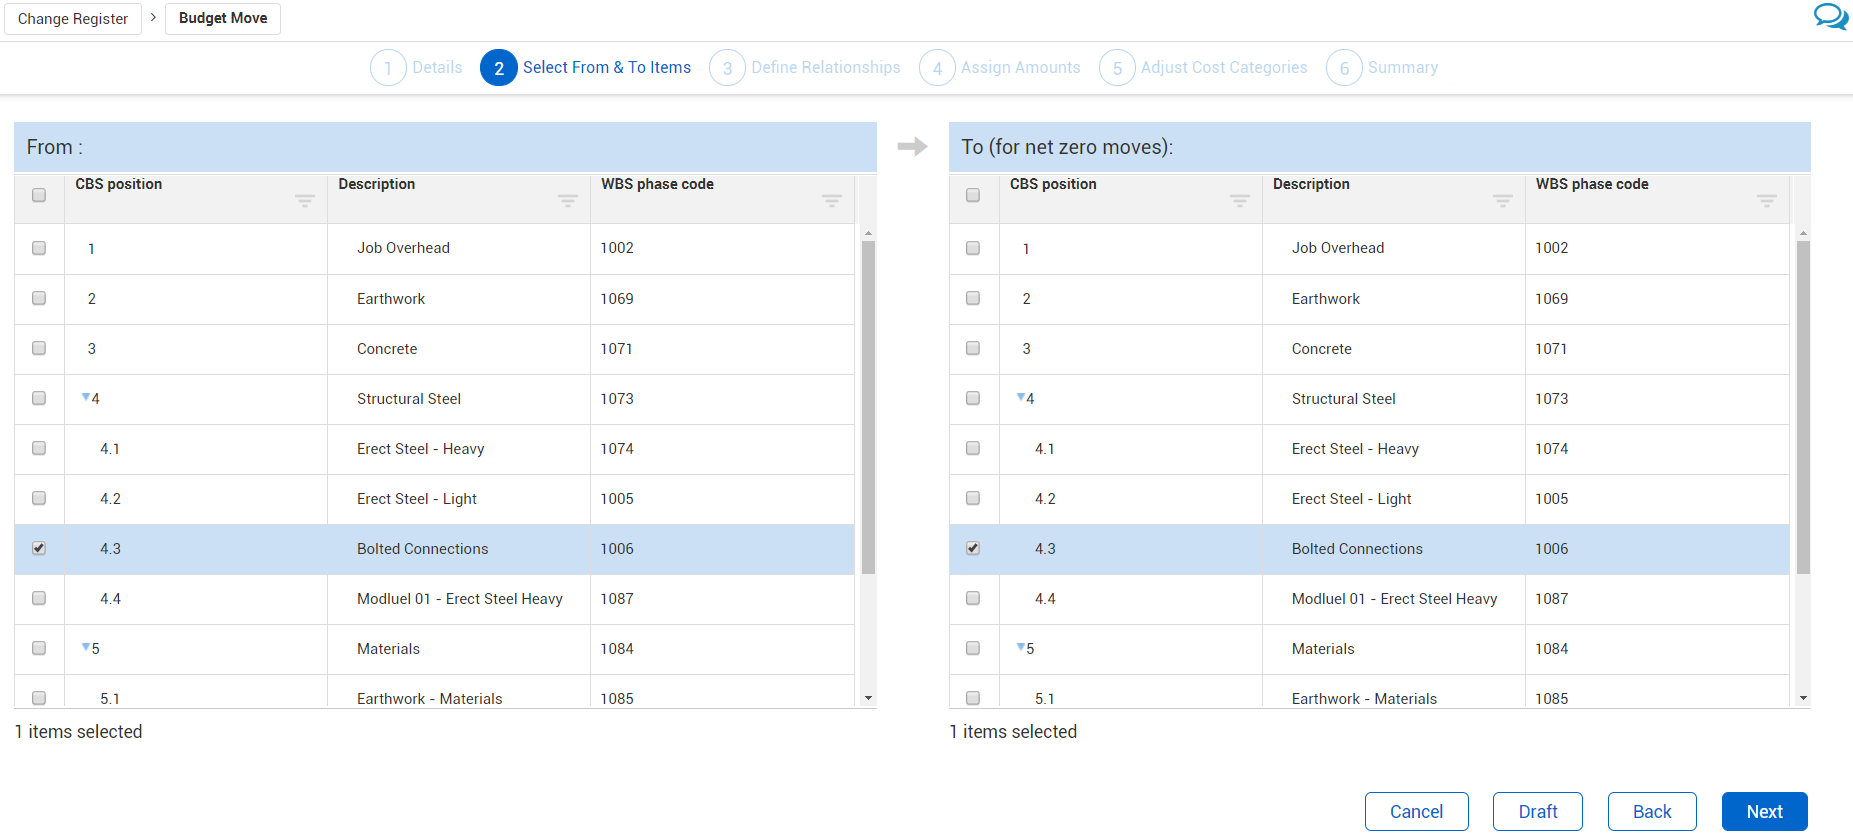
The Select From & To Items tab appears
Select a cost item from the task list on the left.
Select a cost item from the task list on the right.
Click Next.
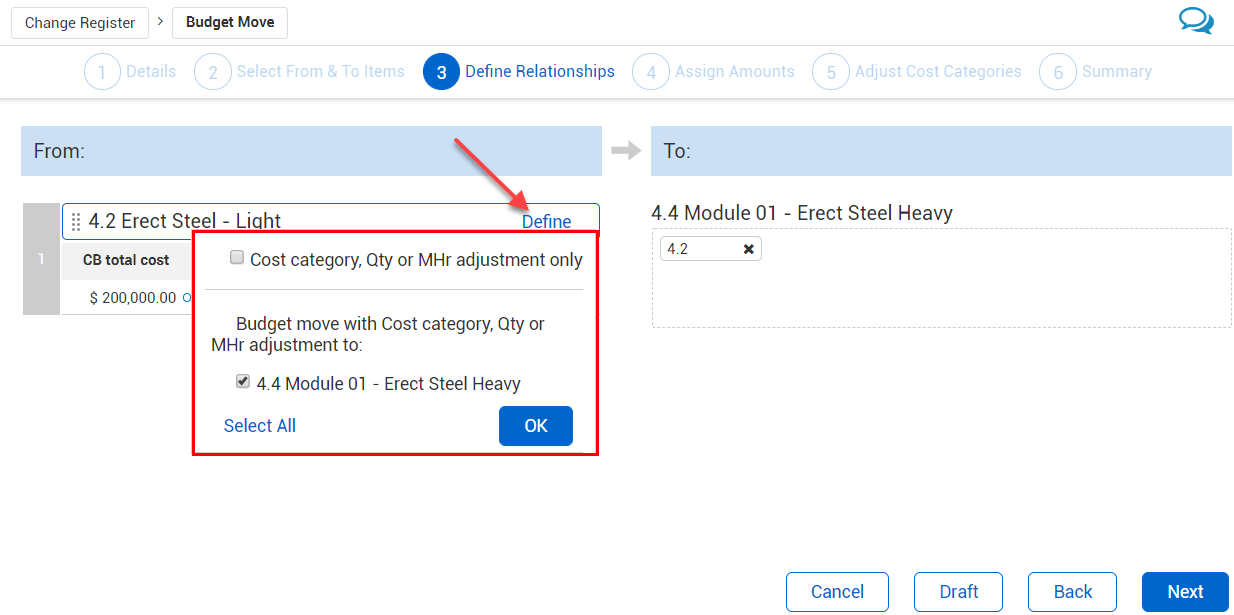
The Define Relationships window appears
The Define button allows you to select what type of relationships the two cost items share
From the Define button, click on Select All.
The Cost category, Qty or MHr only option allows you to modify only the budgeted values of the “From” cost item, similar to the Budget Quantity & Man-Hour Adjustment option from the Actions menu
Selecting the Budget move with Cost category, Qty or MHr to option allows you to move budgeted values of the “From” cost items to the “To” cost items
Click Next.
The Assign Amounts window appears
From this window, you will assign amounts to be moved from one cost item to the other
The CB Total Cost and CB Total MH values entered under the To: section automatically deduct from the equivalent fields in the From: section
CB Total Quantity values entered under the To: section do NOT automatically deduct from the From: section because you could be moving between cost items with differing units of measure
You have the option to either manually or automatically deduct the CB-Total MH. If you select “Advanced options” you can specify whether man-hours automatically deduct or not.
In the To: section of the window, enter 10,000 in the CB-Total Cost field.
In the To: CB-Total MHrs, enter 100.00.
In the To: CB-Total Quantity enter 20.00.
Note that the equivalent costs and man-hours deduct automatically from Erect Steel – Light, but NOT the CB Total Qty
Enter -20.00 in the From: CB Total Qty field.

Click Next.
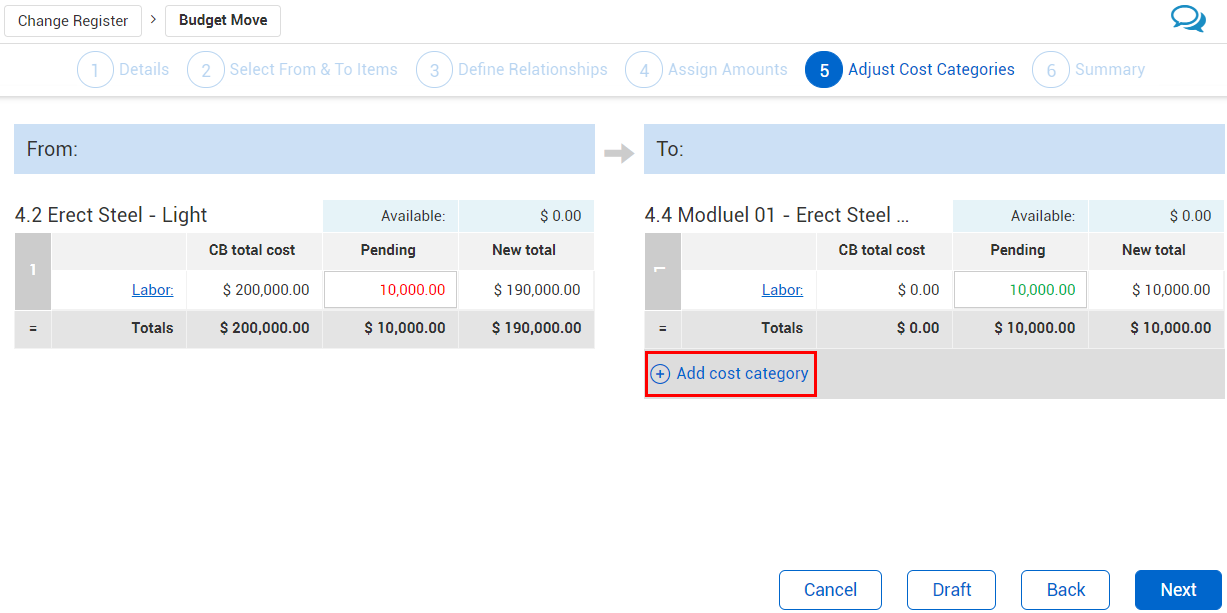
The Adjust Cost Categories window appears
From this window, you can assign your pending budget changes to existing and new cost categories of your cost item
Click the Add cost category link.
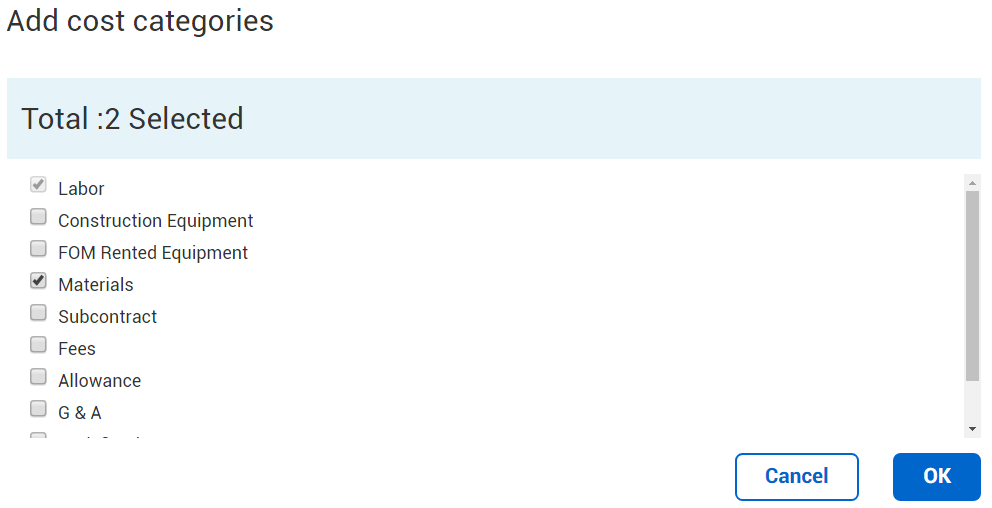
Select Materials on the resulting pop-up window, then click OK.
In the To: field for Materials, enter 10,000.00.
Change the To: Labor field to 0.
The values shown in the Available and Totals fields will auto-adjust based on the values entered in the To: Pending fields
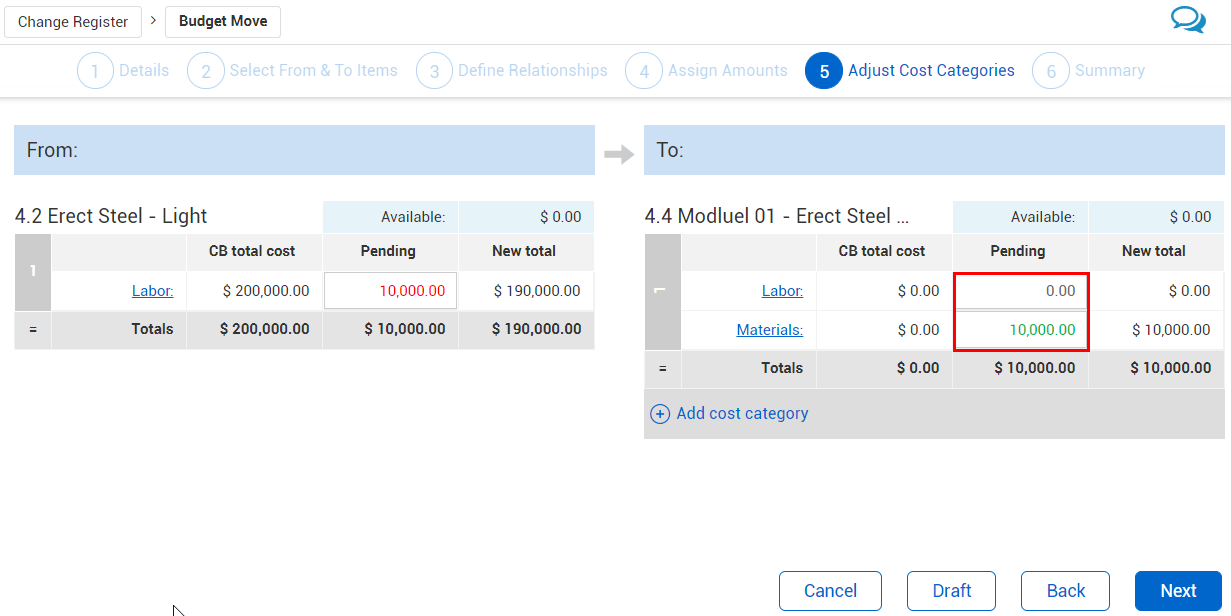
Click Next.
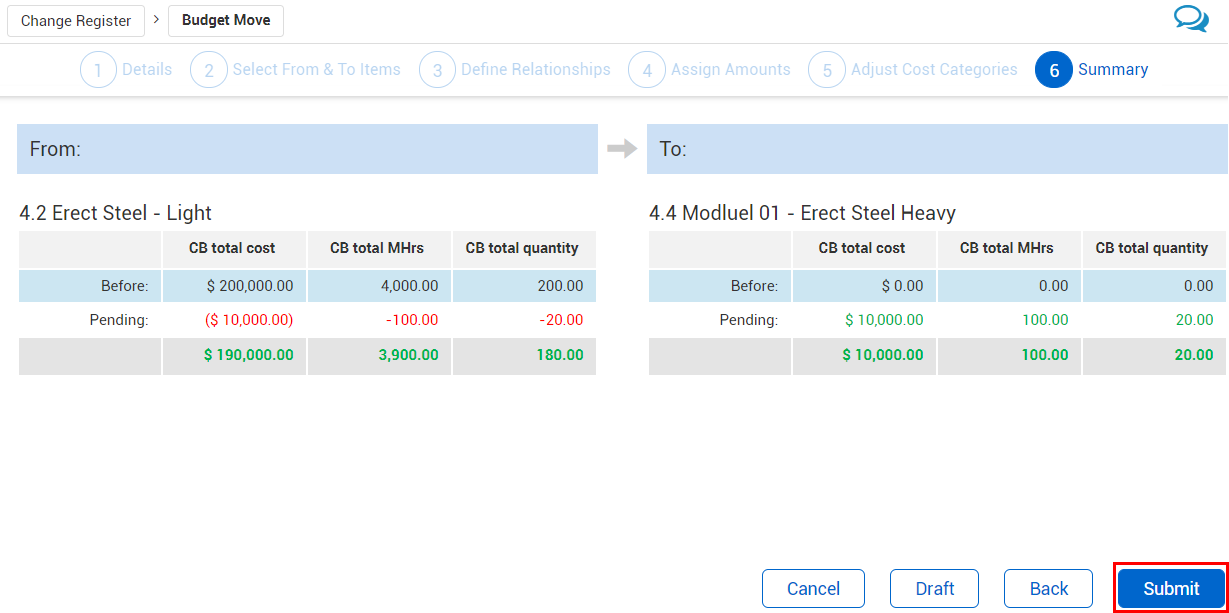
The Summary window appears
Review your proposed changes, then click Submit to send the Contract Adjustment for approval.
This budget move is now listed in the project’s Change Register with a status of Pending
Later in this lesson, you will learn how to approve and modify budget changes from the Change Register. These changes will not reflect in the Current Budget until the contract adjustment is approved.
In other times during your project, you will encounter changes that have the potential to cause a move in your budget within the cost categories of a specific cost item. For example, you may find that some items that you estimated to be self-performed work may be faster and cheaper if they were subcontracted out. Therefore, you can perform a budget move for a single cost item and redistribute the budgeted cost between different cost categories.
In the example structural steel scenario, the Original Budget for a cost item needs to be moved from the Labor cost category to the Subcontract cost category. This estimated self-performed work will now be subcontracted work because this cost item is not our specialty and it would take us longer and be more expensive for us to self-perform this work rather than a specialty subcontractor whom is faster and cheaper.
The following Step by Step walks you through how to perform a 1:1 Budget move within a single cost item in the tool.
Select the Actions drop-down menu, hover over Budget move & contract adjustment, then select Budget move.

The Details window appears
Select the Associated budget move workflow radio button
Type 002XX (where XX are initials) in the Issue # free text box.
The Issue # is a text field used solely for informational purposes
Type Move cost from self-performed to subcontracted in the Description text box.
Click Next.
The Select From & To Items window appears
Select a cost item from the task list on the left.
Select a cost item from the task list on the right.
Click Next on the dialogue box to continue.
The Define Relationships window appears
From the Define button, select Cost category, Qty, or MHr adjustment only.
Selecting the Cost category, Qty, or MHr adjustment only option allows you to move budgeted cost category values within a single cost item

Click OK to close the Define window.
Click Next on the bottom right of the budget move screen to continue.
The Assign Amounts window appears
Click Next on the bottom right of the budget move screen to continue.
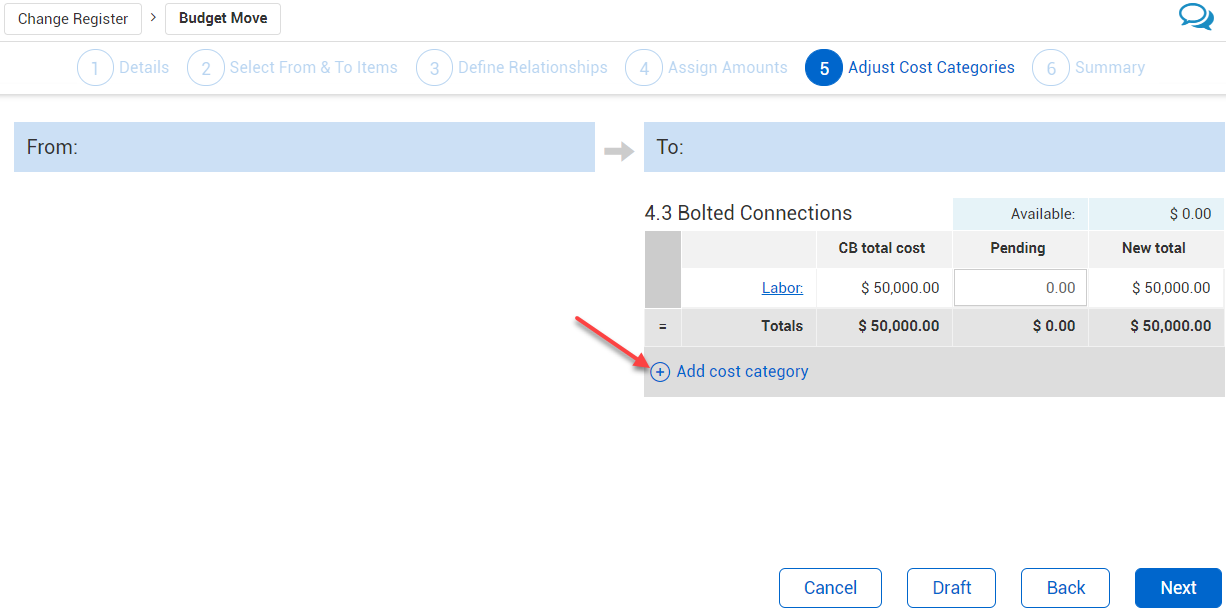
The Budget Move – Adjust Cost Categories window appears
From this window, you can assign your pending budget changes to existing and new cost categories of your cost item
Note: We will skip the Assign Amounts window section because we are not changing the Mhrs or Quantity
Click the Add cost category link.
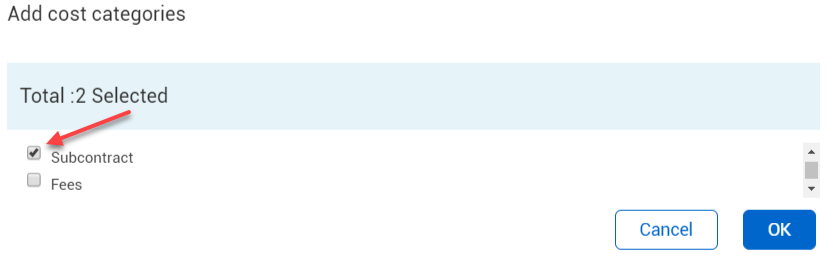
Select Subcontract on the resulting pop-up window, then click OK.
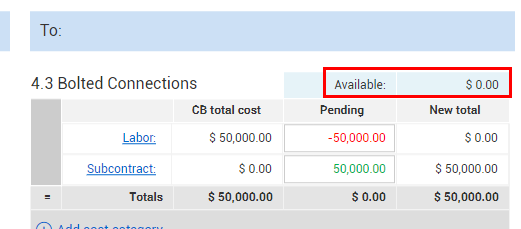
In the To: field for Labor, enter -50,000.00.
In the To: field for Subcontract, enter 50,000.00.
The values shown in the Available and Totals fields will auto-adjust based on the values entered in the To: Pending fields
Click Next.
The Summary window appears
Review your proposed changes, then click Submit to send the Contract Adjustment for approval.
This budget move is now listed in the project’s Change Register with a status of Pending
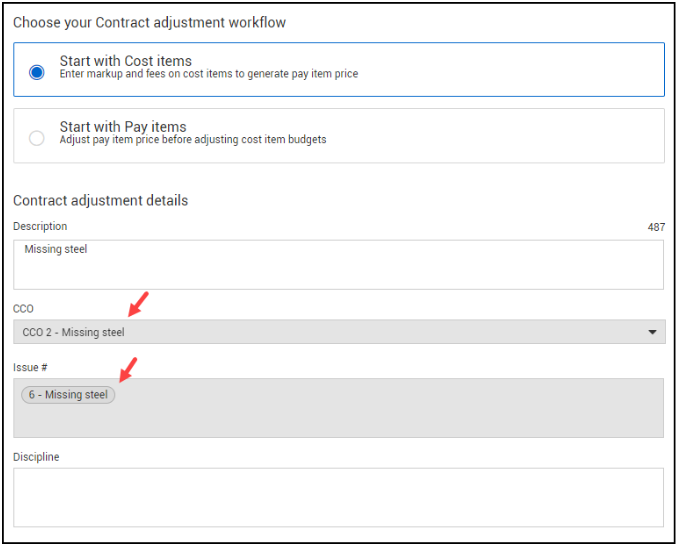
You can also perform a zero-budget move from Change which ultimately creates a budget move in Control.
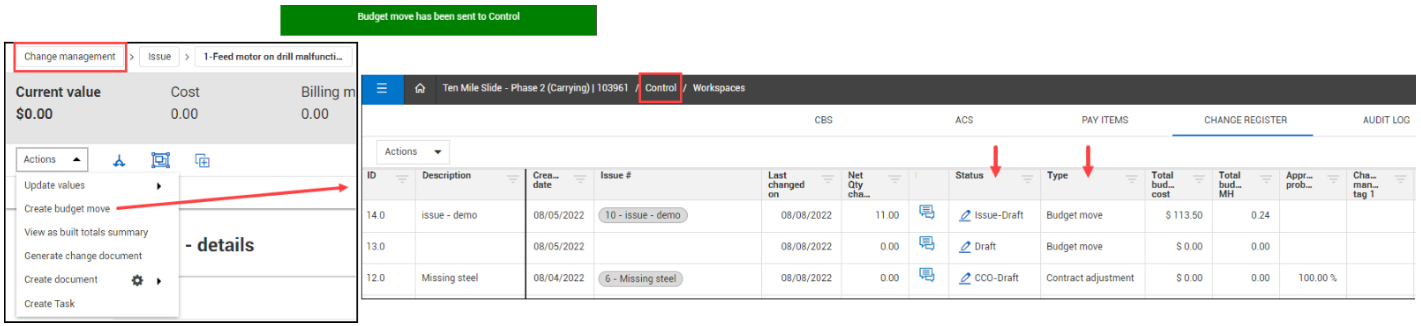
When you create a budget move in Control, all the attributes that were setup in Change now flow into Control automatically.
Additional Information
9977 N 90th Street, Suite 250 Scottsdale, AZ 85258 | 1-800-637-7496
© 2024 InEight, Inc. All Rights Reserved | Privacy Statement | Terms of Service | Cookie Policy | Do not sell/share my information